本文整合spring boot2.x和dubbo2.6.5版本,新版本才出来,暂时先不管他,包括全新的控制台也暂时不管。
一、传统xml方式
一个服务者,一个消费者,服务者将服务注册到Registry,这个用zookeeper来实现。
服务者:服务层,即taotao-manager-service的applicationContext-service.xml将接口注册到zookeeper上。
1
2
3
4
5
6
7
8
9
|
<dubbo:application name="taotao-manager" />
<dubbo:registry protocol="zookeeper" address="ip address:2181" />
<dubbo:protocol name="dubbo" port="20880" />
<dubbo:service interface="com.njupt.swg.service.ItemService" ref="itemServiceImpl" timeout="300000"/>
|
消费者:表现层,即taotao-manager-web的apringmvc.xml中订阅到注册上去的服务。
1
2
3
4
|
<dubbo:application name="taotao-manager-web"/>
<dubbo:registry protocol="zookeeper" address="ip地址:2181"/>
<dubbo:reference interface="com.njupt.swg.service.ItemService" id="itemService" />
|
主要就是以上几个配置,截取于淘淘商城某笔记。依赖就是dubbo和zookeeper客户端。这个就不做了,下面直接上springboot.具体可参考官方文档:快速启动以及schemal含义
二、springboot2.x+dubbo2.6.5实战
本节的代码为:dubbo-example
1、创建聚合工程
创建一个父亲项目,管理pom,所有的modules都受其管理。
1
2
3
4
5
6
7
8
9
10
11
12
13
14
15
16
17
18
19
20
21
22
23
24
25
26
27
28
29
30
31
32
33
34
35
36
37
38
39
40
41
42
43
44
45
46
47
48
49
50
51
52
53
54
55
56
57
58
59
60
61
62
63
64
65
66
67
68
69
70
71
72
73
74
75
76
77
78
79
80
81
82
83
84
85
86
87
88
89
90
91
| <?xml version="1.0" encoding="UTF-8"?>
<project xmlns="http://maven.apache.org/POM/4.0.0" xmlns:xsi="http://www.w3.org/2001/XMLSchema-instance"
xsi:schemaLocation="http://maven.apache.org/POM/4.0.0 http://maven.apache.org/xsd/maven-4.0.0.xsd">
<modelVersion>4.0.0</modelVersion>
<parent>
<groupId>org.springframework.boot</groupId>
<artifactId>spring-boot-starter-parent</artifactId>
<version>2.1.3.RELEASE</version>
<relativePath/>
</parent>
<groupId>com.njupt.swg</groupId>
<artifactId>dubbo-example</artifactId>
<version>0.0.1-SNAPSHOT</version>
<name>dubbo-example</name>
<packaging>pom</packaging>
<description>Demo project for Spring Boot</description>
<modules>
<module>provider-service</module>
<module>consumer-service</module>
<module>dubbo-api</module>
</modules>
<properties>
<project.build.sourceEncoding>UTF-8</project.build.sourceEncoding>
<project.reporting.outputEncoding>UTF-8</project.reporting.outputEncoding>
<java.version>1.8</java.version>
<curator-framework.version>4.0.1</curator-framework.version>
<zookeeper.version>3.4.13</zookeeper.version>
<dubbo.starter.version>0.2.1.RELEASE</dubbo.starter.version>
<dubbo.version>2.6.5</dubbo.version>
</properties>
<dependencies>
<dependency>
<groupId>org.springframework.boot</groupId>
<artifactId>spring-boot-starter-web</artifactId>
</dependency>
<dependency>
<groupId>com.alibaba.boot</groupId>
<artifactId>dubbo-spring-boot-starter</artifactId>
<version>${dubbo.starter.version}</version>
</dependency>
<dependency>
<groupId>com.alibaba</groupId>
<artifactId>dubbo</artifactId>
<version>${dubbo.version}</version>
</dependency>
<dependency>
<groupId>org.apache.curator</groupId>
<artifactId>curator-framework</artifactId>
<version>${curator-framework.version}</version>
</dependency>
<dependency>
<groupId>org.apache.curator</groupId>
<artifactId>curator-recipes</artifactId>
<version>${curator-framework.version}</version>
</dependency>
<dependency>
<groupId>org.apache.zookeeper</groupId>
<artifactId>zookeeper</artifactId>
<version>${zookeeper.version}</version>
</dependency>
<dependency>
<groupId>org.springframework.boot</groupId>
<artifactId>spring-boot-starter-test</artifactId>
<scope>test</scope>
</dependency>
</dependencies>
<build>
<plugins>
<plugin>
<groupId>org.springframework.boot</groupId>
<artifactId>spring-boot-maven-plugin</artifactId>
</plugin>
</plugins>
</build>
</project>
|
2、公共的API接口
新创建一个module叫做dubbo-api,里面放的是公共的调用接口:
1
2
3
| public interface DemoService {
String sayHello(String name);
}
|
3、服务提供者
首先就是pom文件,处理继承父类意外,额外需要注意的是需要依赖于上面一个公共的接口工程,由于API工程是以jar形式存在,所以跟引用普通jar文件一样去依赖它:
1
2
3
4
5
6
7
| <dependencies>
<dependency>
<groupId>com.njupt.swg</groupId>
<artifactId>dubbo-api</artifactId>
<version>0.0.1-SNAPSHOT</version>
</dependency>
</dependencies>
|
这样,服务提供者就可以用这个接口了,后面的消费者也一样,就可以拿到这个接口去消费了。这里先完成服务提供者的实现类:
1
2
3
4
5
6
7
8
9
10
11
12
13
14
15
16
| import com.alibaba.dubbo.config.annotation.Service;
import com.njupt.swg.DemoService;
import org.springframework.beans.factory.annotation.Value;
@Service
public class DemoServiceImpl implements DemoService {
@Value("${dubbo.application.name}")
private String serviceName;
public String sayHello(String name) {
return String.format("[%s] : Hello, %s", serviceName, name);
}
}
|
注意这里的注解@Service不是spring中的包注解,而是dubbo中用于暴露服务出去的注解,所以千万不要搞错。需要注意的是,如果还是需要将其作为spring的一个bean的话,则可以用@Component来注解,避免混淆。
另外最需要注意的就是配置文件了:
1
2
3
4
5
6
7
8
9
10
11
12
13
14
15
16
17
18
| # Spring boot 应用名称
spring.application.name=provider-service
server.port=9001
# Dubbo服务名称
## The default value of dubbo.application.name is ${spring.application.name}
dubbo.application.name=provider-service
# 通信使用dubbo协议,端口为20880
dubbo.protocol.name=dubbo
dubbo.protocol.port=20880
# 以zookeeper为注册中心
dubbo.registry.address=127.0.0.1:2181
dubbo.registry.protocol=zookeeper
# monitor监控台
dubbo.monitor.protocol=registry
|
这些其实跟传统的xml配置方式是一样的,所以大体都是一样的。最后在启动函数上添加:
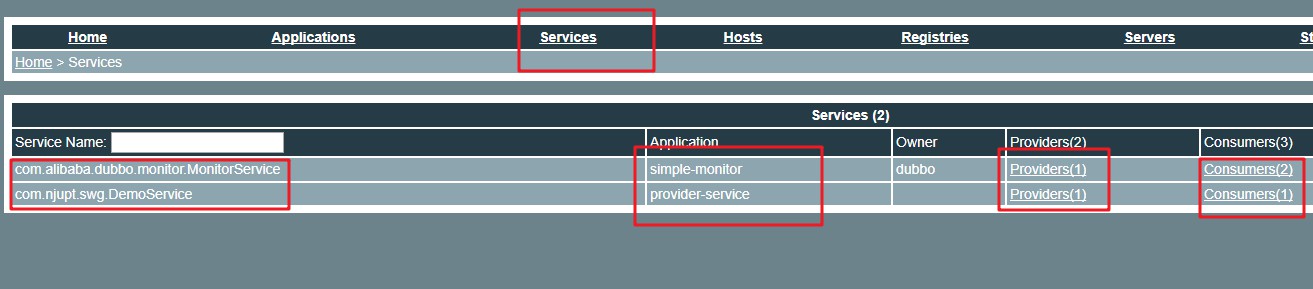
这样启动服务提供者,不报错的话,那么在服务管理中心就可以查看到这个服务已经起来了,加上我们已经准备好的monitor,此时应该有两个服务在上面了。
4、服务消费者
关于配置文件、pom文件以及启动函数上的注解都跟上面类似,不再赘述。下面直接尝试去调用服务:
1
2
3
4
5
6
7
8
9
10
11
12
13
14
15
16
| import com.alibaba.dubbo.config.annotation.Reference;
import com.njupt.swg.DemoService;
import org.springframework.web.bind.annotation.RequestMapping;
import org.springframework.web.bind.annotation.RestController;
@RestController
public class DemoController {
@Reference
private DemoService demoService;
@RequestMapping("test")
public String test(){
String res = demoService.sayHello("fossi!");
return res;
}
}
|
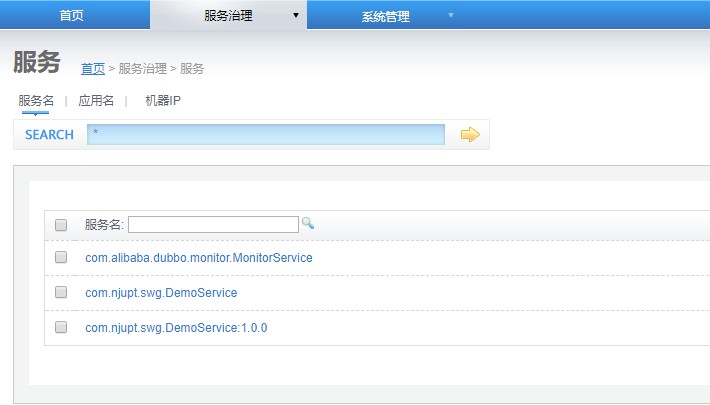
注意这里的@Reference不要引用错了。启动,此时不出意外的话,应该在服务治理页面上会看到如下:
我们来消费一下:
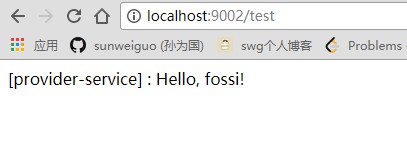
监控台也可以接受到消费的信息:
这样,一次完整的服务提供和消费的实战就完成了。