用户表
1
2
3
4
5
6
7
8
9
10
11
| DROP TABLE IF EXISTS `t_user_0`;
CREATE TABLE `t_user_0` (
`id` bigint(20) NOT NULL,
`uuid` bigint(20) NOT NULL,
`email` varchar(50) NOT NULL,
`password` varchar(100) NOT NULL,
`nickname` varchar(100) NOT NULL,
`mobile` varchar(20) DEFAULT NULL,
`create_time` timestamp NOT NULL DEFAULT CURRENT_TIMESTAMP ON UPDATE CURRENT_TIMESTAMP,
`update_time` timestamp NOT NULL DEFAULT CURRENT_TIMESTAMP ON UPDATE CURRENT_TIMESTAMP
) ENGINE=InnoDB DEFAULT CHARSET=utf8mb4;
|
uuid是用于分表的依据,不能重复,至于如何生成以后再说。t_user_0建表成功之后,复制两份,做成三份的分表演示。放在一个单独的数据库mama-buy-user里.
新建项目mama-buy-user-service
新建boostrap.yml文件,这个文件的启动优先级比application.yml要高,主要是要去配置读取config的服务;然后注册到eureka上;下面弄一个shardingJDBC来做分库分表,最后是logback日志。
1
2
3
4
5
6
7
8
9
10
11
12
13
14
15
16
17
18
19
20
21
22
23
24
25
26
27
28
29
30
31
32
33
34
35
36
37
38
39
40
41
42
43
44
45
46
47
48
49
50
51
52
53
54
| # 高优先级启动
server:
port: 8002
spring:
application:
name: user-service # 与git仓库中的配置文件要一致
profiles:
active: dev
cloud:
config:
profile: dev # 这个结合name找到配置文件
discovery:
enabled: true
service-id: config-server #config服务名字
eureka:
client:
service-url:
defaultZone: http://111.231.119.253:8761/eureka
sharding:
jdbc:
datasource:
names: ds
ds:
name: user
type: com.alibaba.druid.pool.DruidDataSource
driver-class-name: com.mysql.jdbc.Driver
filters: stat
maxActive: 20
initialSize: 1
maxWait: 60000
minIdle: 1
timeBetweenEvictionRunsMillis: 60000
minEvictableIdleTimeMillis: 300000
validationQuery: select 'x'
testWhileIdle: true
testOnBorrow: false
testOnReturn: false
poolPreparedStatements: true
maxOpenPreparedStatements: 20
config:
sharding:
tables:
t_user:
actual-data-nodes: ds.t_user_${0..2} # 分的表名
key-generator-column-name: uuid #用雪花算法自动生成保证不重复
table-strategy:
inline:
sharding-column: uuid # 按照uuid进行分表
algorithm-expression: t_user_${uuid % 3} # 分表的算法,取模
# instance:
# ip-address:
# prefer-ip-address: true
logging:
config: classpath:logback.xml
|
还有关于数据库账号密码等配置,可以单独放在bootstrap-dev.yml:
1
2
3
4
5
6
7
8
9
10
11
12
13
14
15
16
17
18
19
20
21
22
23
24
| spring:
cloud:
stream:
kafka:
binder:
brokers: ${kafka.brokers.host}
zk-nodes: ${zookeeper.host}
auto-create-topics: true
bindings:
input:
destination: dis-transation
group: point-group
sharding:
jdbc:
datasource:
names: ds
ds:
url: jdbc:mysql://127.0.0.1:3306/mama-buy-user
username: root
password: root
redis:
node: ${redis.host}
zk:
host: ${zookeeper.host}
|
一开始启动报错,可以将session相关的依赖先注释掉。
ok,根据逆向工程生成用户相关的文件。
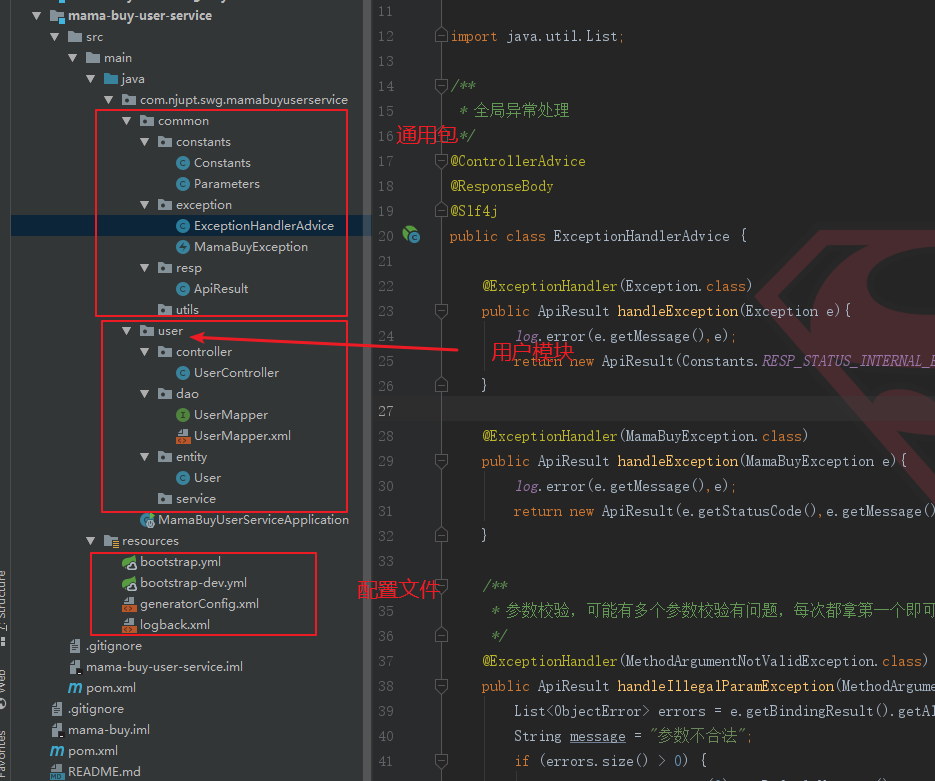
上面在工程可以正常启动的情况下,增加一些类,比如全局异常处理类:
1
2
3
4
5
6
7
8
9
10
11
12
13
14
15
16
17
18
19
20
21
22
23
24
25
26
27
28
29
30
31
32
33
34
35
|
@ControllerAdvice
@ResponseBody
@Slf4j
public class ExceptionHandlerAdvice {
@ExceptionHandler(Exception.class)
public ApiResult handleException(Exception e){
log.error(e.getMessage(),e);
return new ApiResult(Constants.RESP_STATUS_INTERNAL_ERROR,"系统异常,请稍后再试");
}
@ExceptionHandler(MamaBuyException.class)
public ApiResult handleException(MamaBuyException e){
log.error(e.getMessage(),e);
return new ApiResult(e.getStatusCode(),e.getMessage());
}
@ExceptionHandler(MethodArgumentNotValidException.class)
public ApiResult handleIllegalParamException(MethodArgumentNotValidException e) {
List<ObjectError> errors = e.getBindingResult().getAllErrors();
String message = "参数不合法";
if (errors.size() > 0) {
message = errors.get(0).getDefaultMessage();
}
ApiResult result = new ApiResult(Constants.RESP_STATUS_BADREQUEST,message);
return result;
}
}
|
还有就是统一返回封装类,常量类等。都不再赘述,比较简单。后面要完成用户的注册等操作。